Bedrock 1.21 Simple Auto Smelter Tutorial
Resources, resources, resources…. As we all know, in Minecraft gathering resources can be cumbersome. Once you gather resources such as iron ore, you need to smelt the ore before you are able to craft useful items such as a sword or an axe.
Normally you can only load 64 ore into a furnace at one time. So if you have many stacks of ore, this can take a while. In this tutorial, BiomeNomad will show you how to make a Minecraft auto smelter. This automatic smelter is simple to build and it eliminates the need to only smelt 64 ore at one time.
Smelting is not all this simple auto smelter can do! Learn more below…..
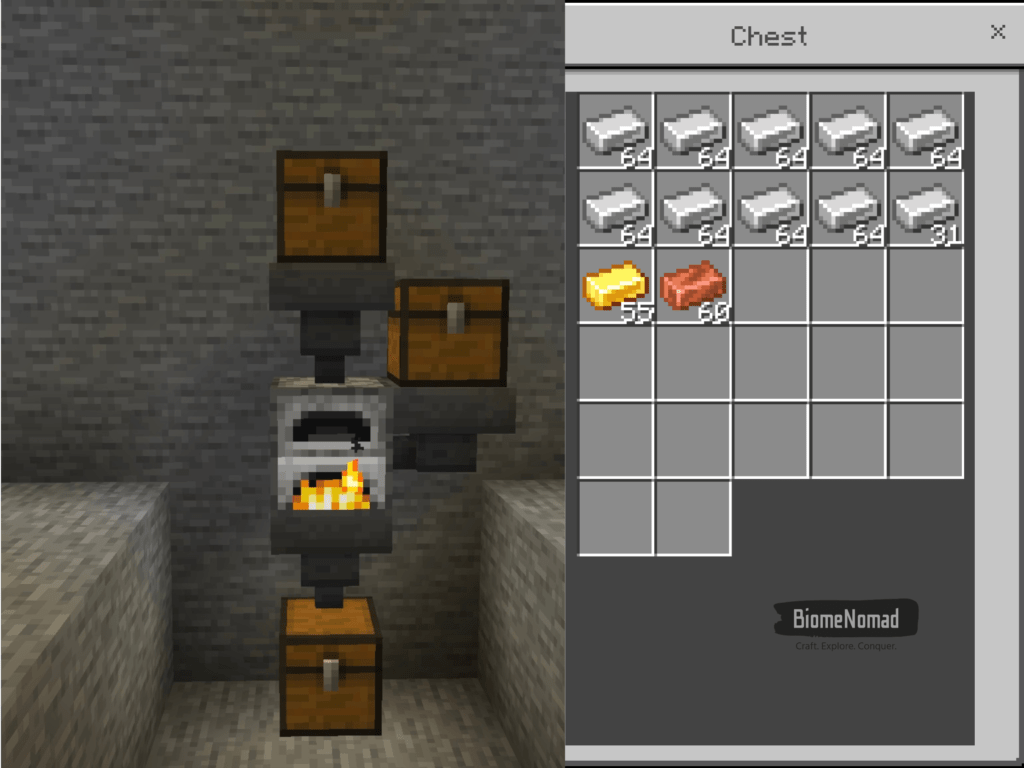
What resources are needed to create a Minecraft auto smelter?
To make a simple Minecraft auto smelter you need the following components:

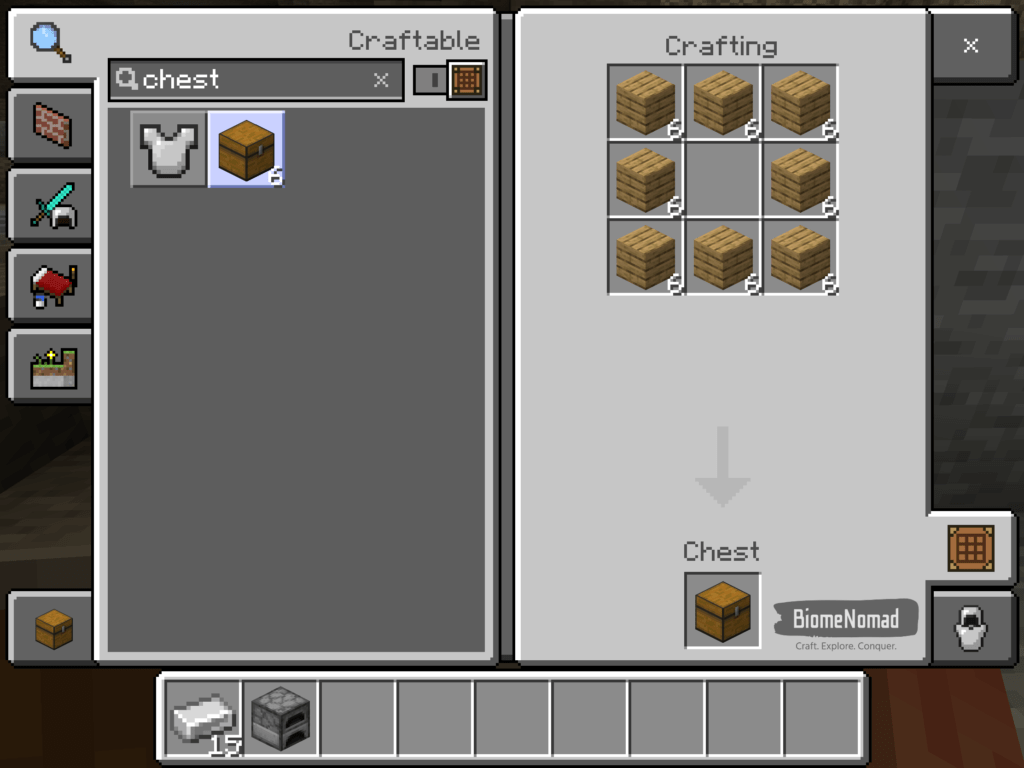
6 Chests
The chests require a total of 48 wooden planks, they can be made from any kind of wood. Gather them from any forest, or another good place to look is mineshafts. Don’t forget to bring your AXE! – You only need 6 chests if you want to make double chests for the input, output and fuel chests.
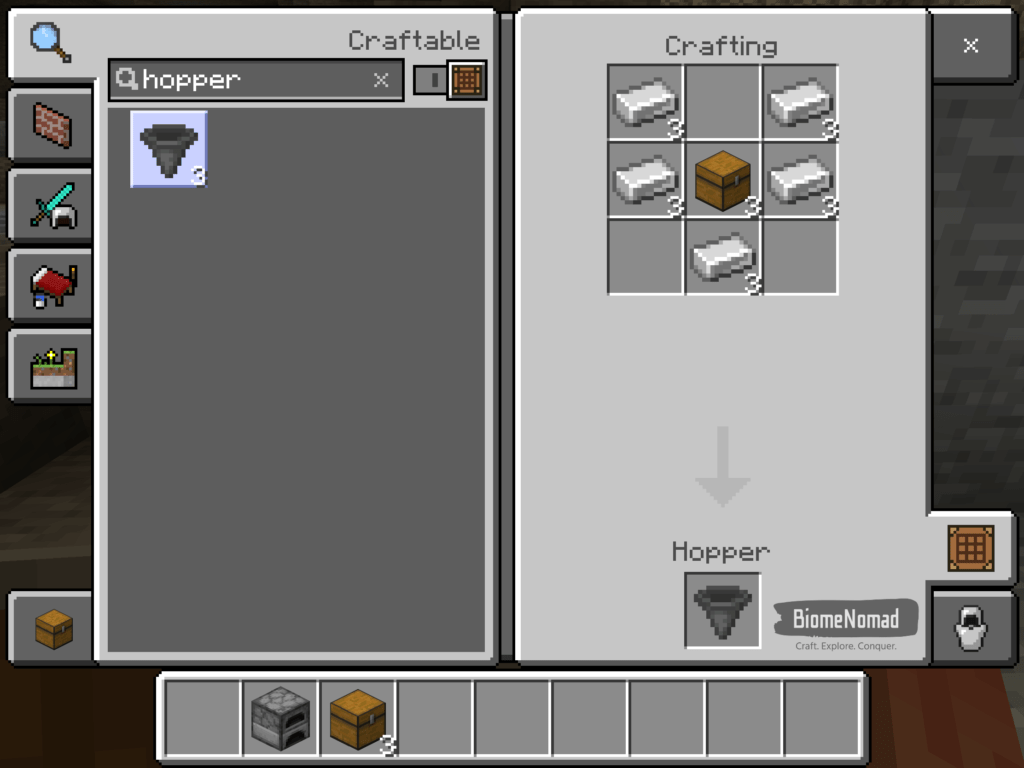
3 Hoppers
The 3 hoppers will require 3 Chests(see below) and 15 iron ingots. In order to create the hoppers, you need to open a crafting table and have those items listed in your inventory. The best place to find iron ore is down in mineshafts or large cave systems. You should be able to get both the wooden planks and the iron or from the same mineshaft.
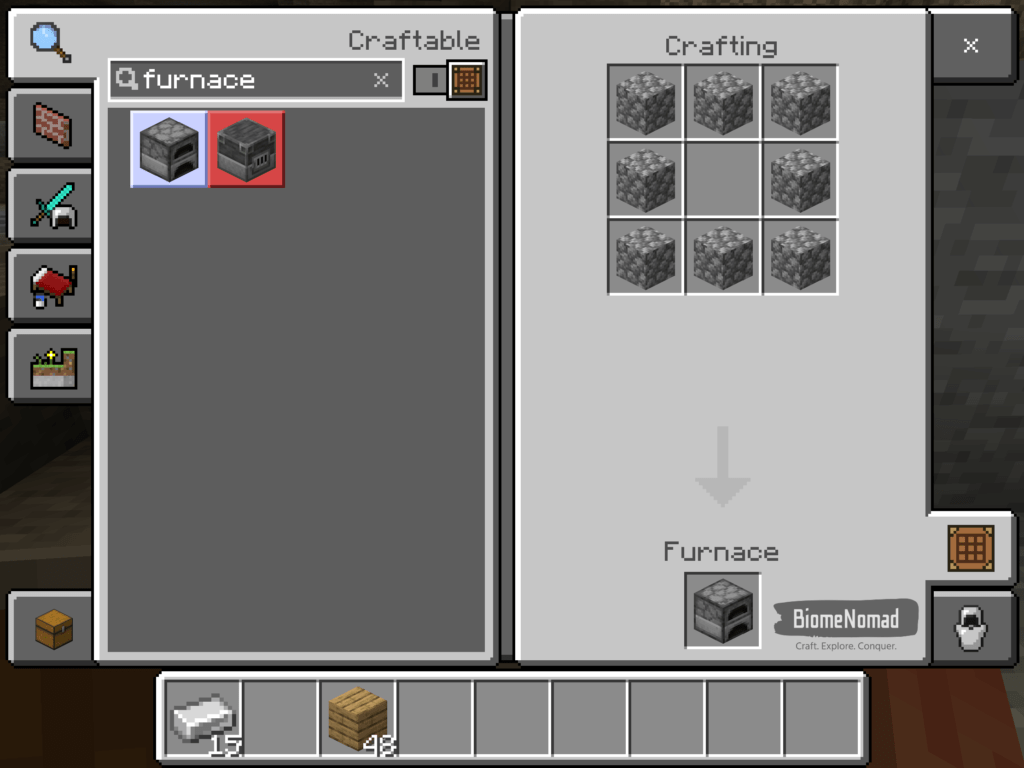
1 Furnace
The Furnace is the easiest part to collect materials for this automatic smelter. You will just need a total of 8 cobblestone and a crafting table to create the Minecraft furnace.
Best Location for a minecraft auto smelter
- Inside your base – creates a safe place for you to access the chest.
- Fenced in area – This also works to keep mobs away. You can still be hit from above by phantoms and at range by skeletons. Be sure to lite the area well with torches!
It is best to craft this Minecraft auto smelter somewhere that is not accessible by mobs like creepers. You don’t want to be collecting all of the smelted materials only to have a creeper explode behind you. That has never happened to BiomeNomad! (a spider actually killed me while afk)
Since this is a compact smelter it does not need a huge amount of space. Consider having a spot that is at least 5 blocks deep, 6 blocks wide and 8 blocks tall. This will give you ample space to craft the smelter.
Steps to build a simple auto smelter
Step 1 – Place the output chest
The first step is to dig a small hole 3 x 3 by two blocks deep. This is where you will place your chest that catches anything that you run through the smelter. It should look something like the picture below.
Since this is just a simple automatic smelter, I do not have any sorting capability built into this tutorial. Check back for more advanced builds.

Step 2 – Place Output Hopper
The output hopper should be placed on top of the output chest. This allows any items that go through the furnace to drop into the chest. Be certain that the hopper is pointing down and not towards the wall.
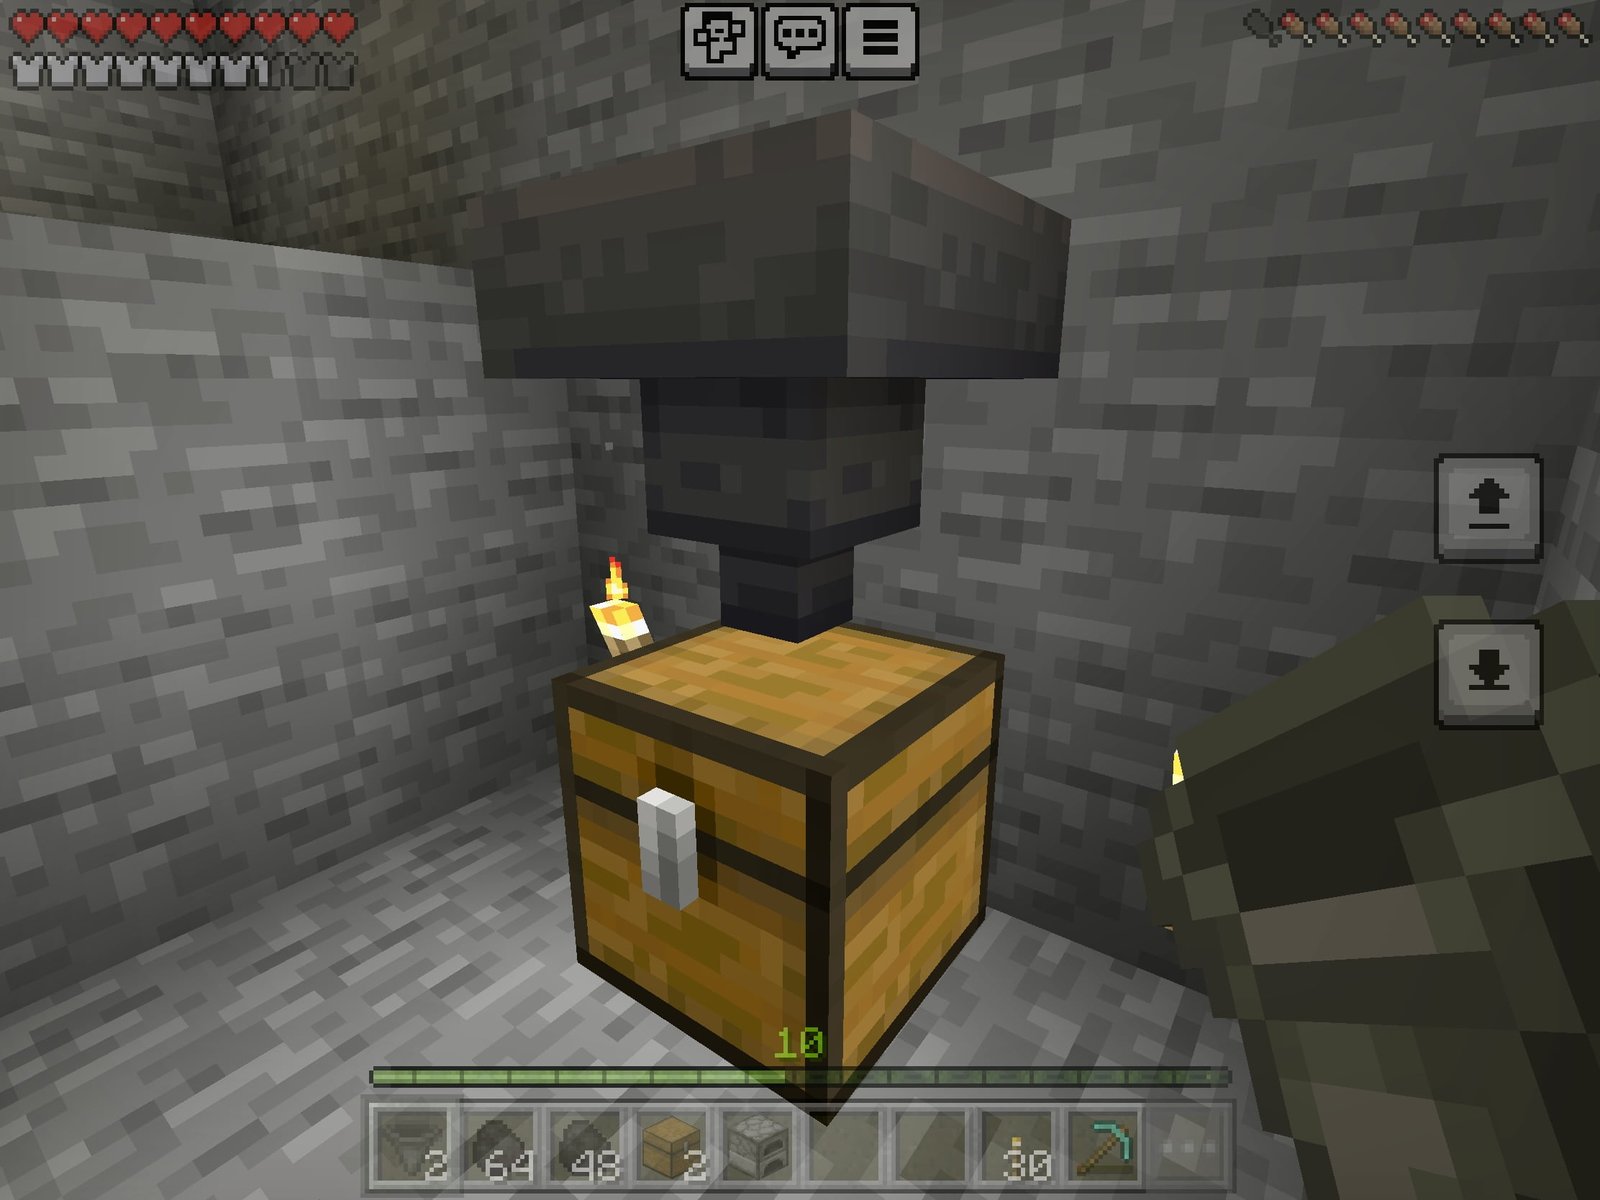
Step 3 – Place the Furnace
The Furnace gets placed directly on top of the output hopper. The best way to place the furnace on top of the output hopper is by using sneak. You should sneak so you do not end up opening the hopper while trying to place the furnace.
Once the furnace is done smelting the items drop into the hopper which will then funnel them into the chest below.

Step 4 – Place Fuel Input Hopper
This hopper has to feed into either the side or the back of the furnace. I typically use the right side for all of my fuel feed. Make sure that the hopper is pointing into the furnace and not downward.
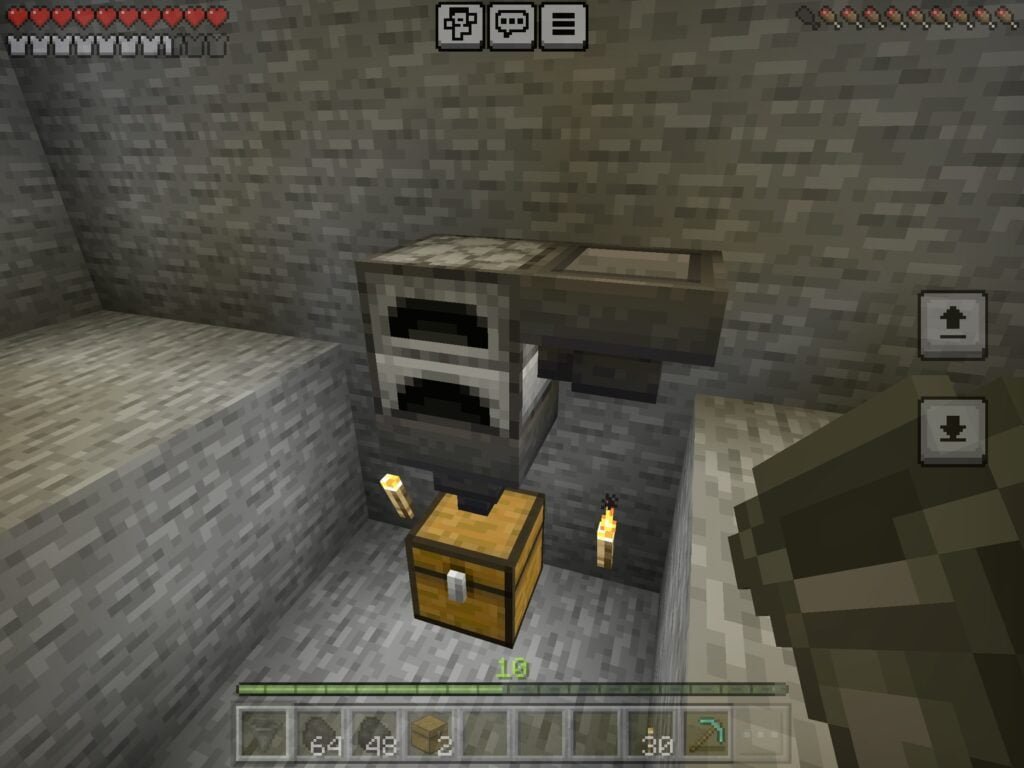
Step 5 – Place Fuel Input Chest
The Fuel input chest gets placed on top of the hopper that you just added to the furnace. I usually find it easier to place things on top of the hoppers if I am sneaking. Otherwise the hopper opens up so you can place things in it.
This fuel input chest is used to hold the fuel that you plan to use in the furnace. I typically use stacks of coal.
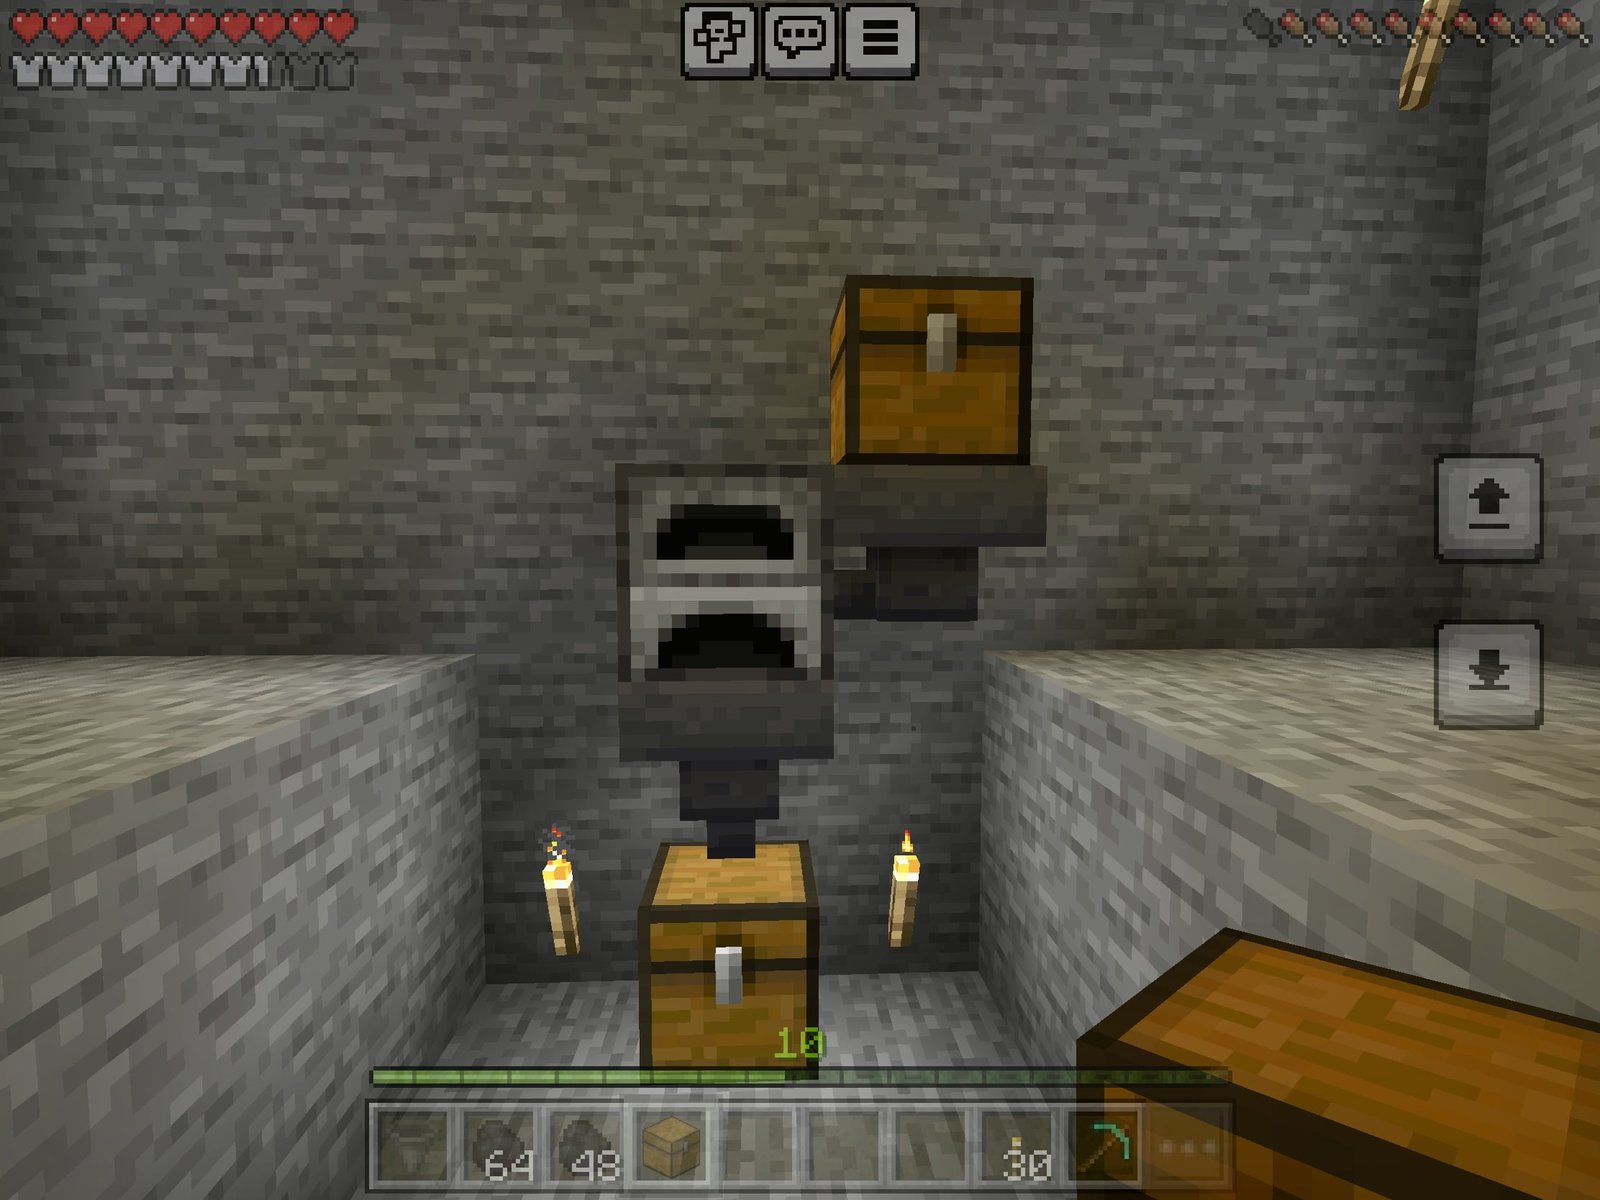
Step 6 – Place Material input hopper
This hopper goes directly above the furnace pointing down into the furnace. It will act as a funnel between the input chest and the furnace.
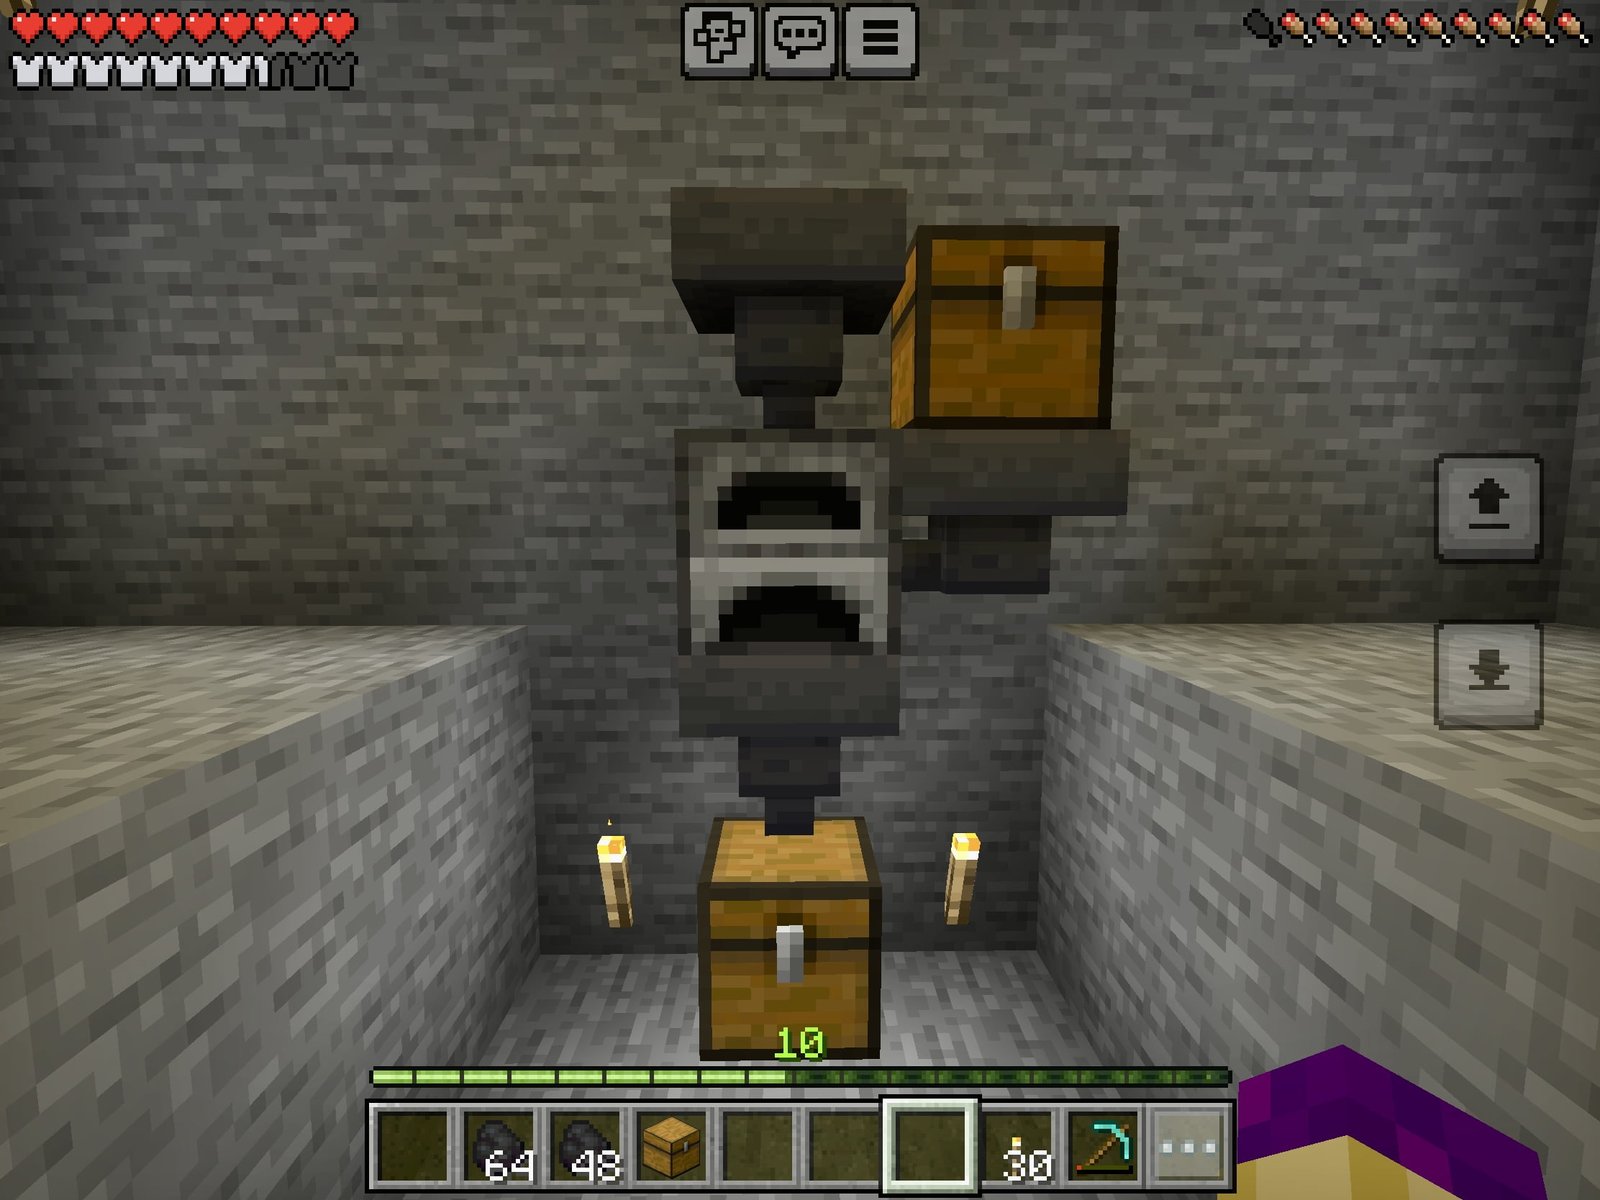
Step 7 – Place the material input chest
This chest sits directly on top of the material input hopper for the auto smelter. Use sneak when placing this item so the hopper does not open up.
This chest is where you place all of the materials to be processed by the auto smelter.
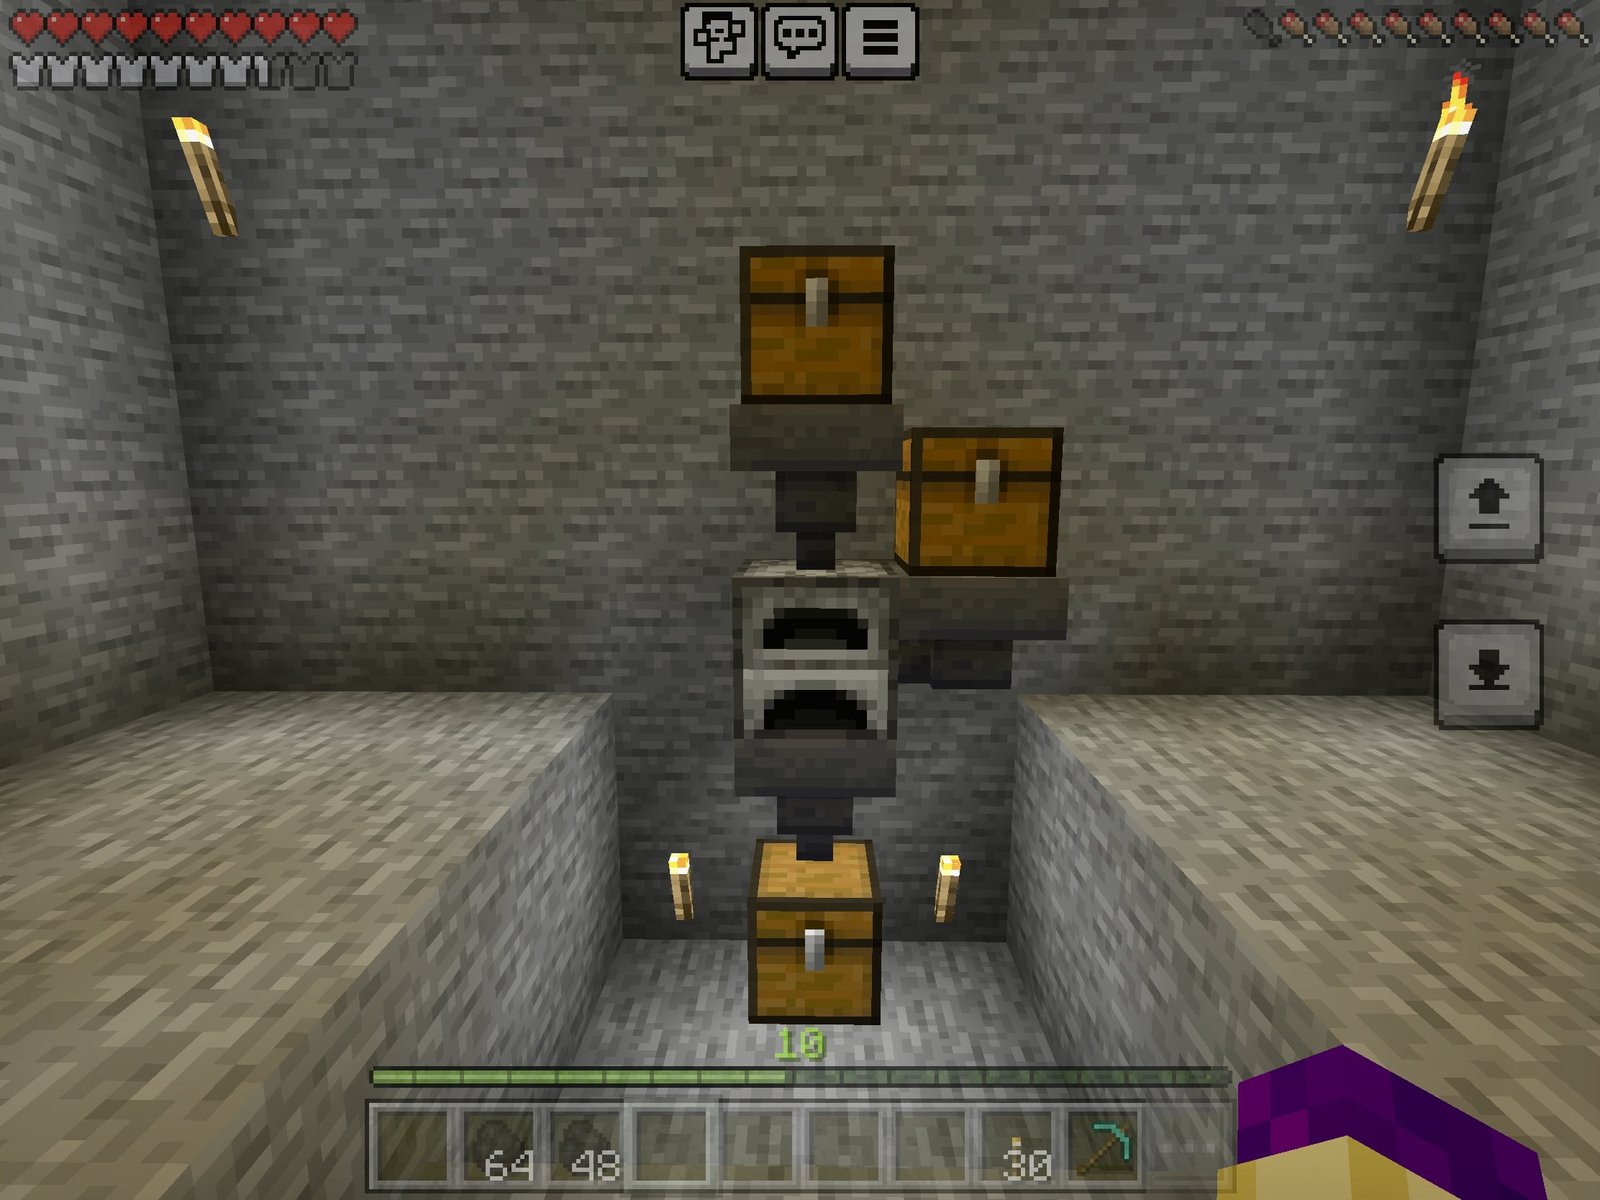
Step 8 – Load the auto smelter
Place some fuel in the chest that you added to the right side or the chest in step 5. This will keep the smelter full of fuel.
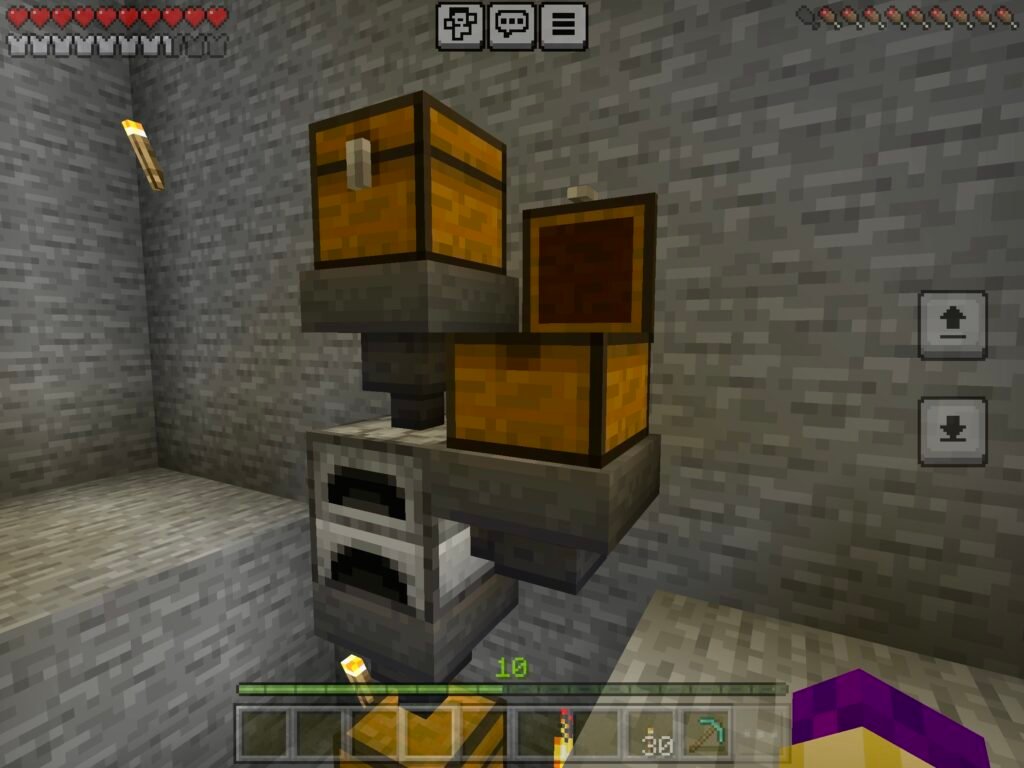
Step 9 – Place Materials in material input chest
This is where you place all of your ore that you wish to smelt. You can place as many types of ore as you want in the chest. It will fill move the items from the material input chest into the furnace, once smelted it automatically moves down to the output chest at the bottom of the simple auto smelter.
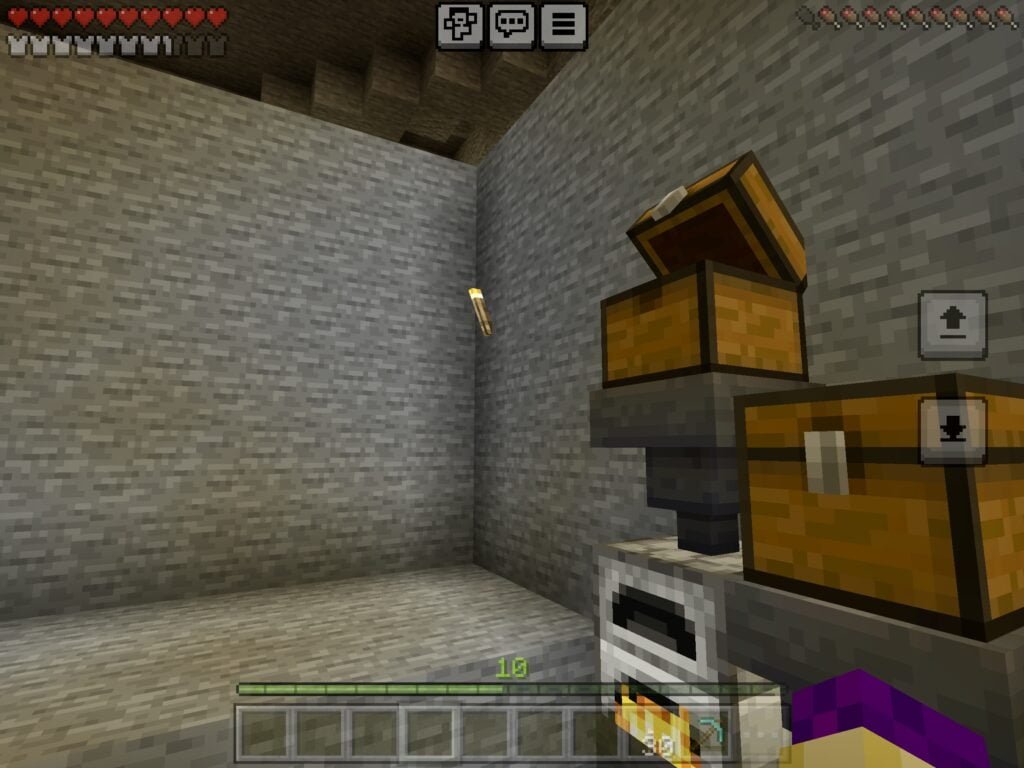
Bonus – Other uses for the Simple Auto Smelter
In Minecraft the furnace can actually do more then just smelt Ore into simple ingots. You can also do the following other things in this simple build:
- Smelt: Sand = Glass Blocks
- Smelt: Clay = Clay Bricks
- Smelt: Cobblestone = Stone
- Smelt: Clay Block = Hardened Clay
- Smelt: Netherrack = Nether Brick
- Cook: Chicken, Pork, Cow, Sheep, Fish, Potato
**Do not put ORE Blocks that were collected with soft touch in the auto smelter, smelting ore bocks will waste a lot of resources. It is better to use a fortune 3 pickaxe on the block to get more ores.
Related Posts:
- Simple Smooth Stone Generator
- Simple Auto Trash Bin
